I've had a small HOB filter on my 5 gallon shrimp tank for some time now. It does it's job farily well, but I had been wanting to do something more effecent for filtration. As this is a shrimp only tank, a lot of crud doesn't get sucked in by the filter just because my cherry shrimp aren't that messy. Plus, I just love doing a good DIY project just for the sake of doing it.
Over time of searching the net for various things I recall seeing plans and idea's for a DIY canister filter. While the idea intreaged me, I had always thought it to be too much of a hasle to really bother with. Then I cam across plans for a 'nano' canister filter just for small tanks. I was blown away by the simplisity of said filter, and decided that it was time to give it a whirl.
So I went shopping last night for a container to act as the main canister houseing. This is where the pump and the media would be. I chose to use a 'Lock and Lock' brand container.

I was rather happy to see that my local wal-mart carried these. I had read account of others not being able to find these and were using regular zip lock containers. The zip lock containers apparently were good about not letting air in, but not so good at keeping the water in. The Lock and Lock containers not only have the four clips to hold the lid on, but also a silicone gasket to further help create an airtight/watertight seal. Anything can conseavably be used for a container, as long as it can be airtight. I opted for the square container so that I wouldn't have to drill, or seal up any holes made on a round surface.
Total cost so far, $2.97 per container, I bought two 'just in case'.
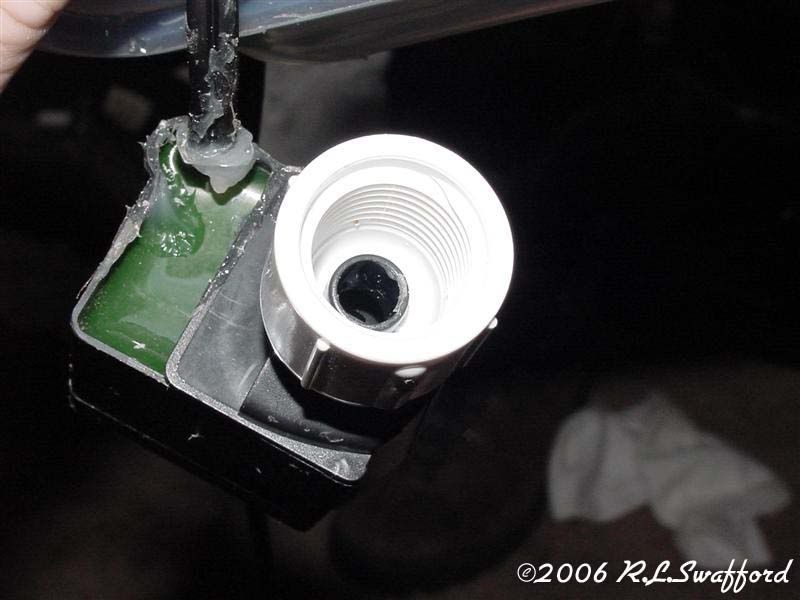
The most pricey item for a project like this is going to be the pump. But thankfully my years of hording up old parts and equipment have paid off some what, and I had a few pumps on hand that I could choose from. I decided to use an exo-terra repti-pump. It was made to power a small water feature in a reptile setup. It has a low flow rate, and small size so it is perfect for this project.
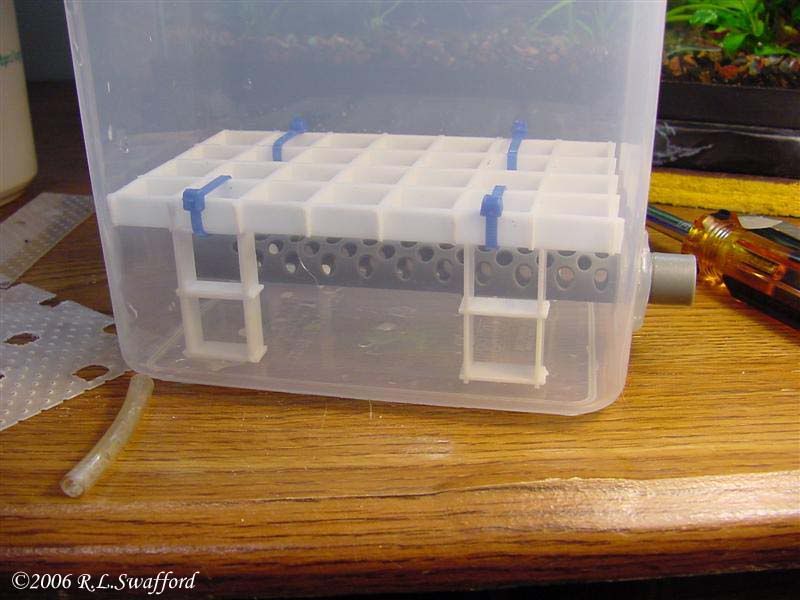
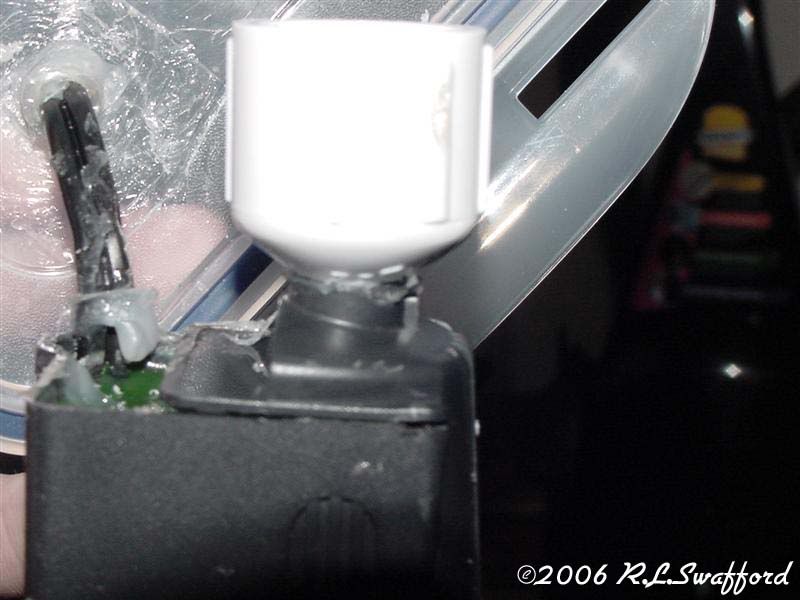
I decided to place the pump inside the actualy container for a few reasons. First of all so that I didn't have to have any equipment showing in the tank, and secondly to keep things neater by keeping the 'filter' as compact as possible.
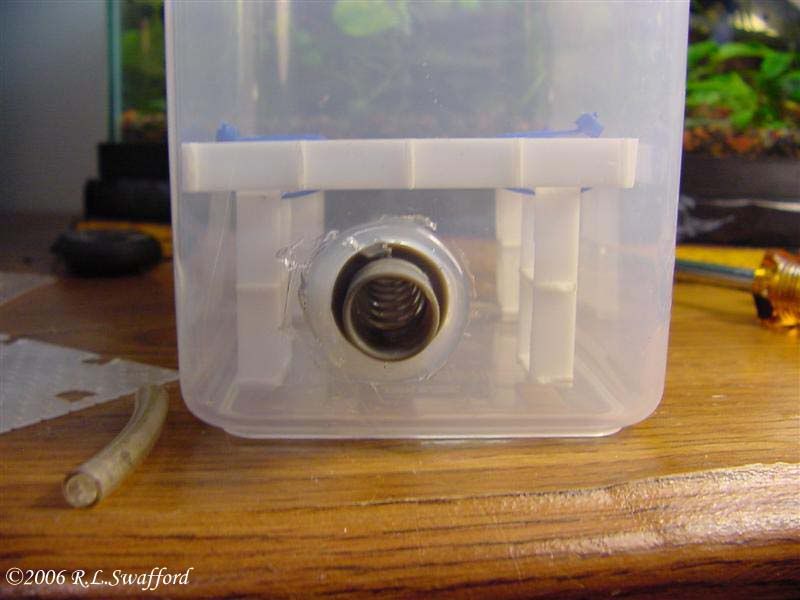
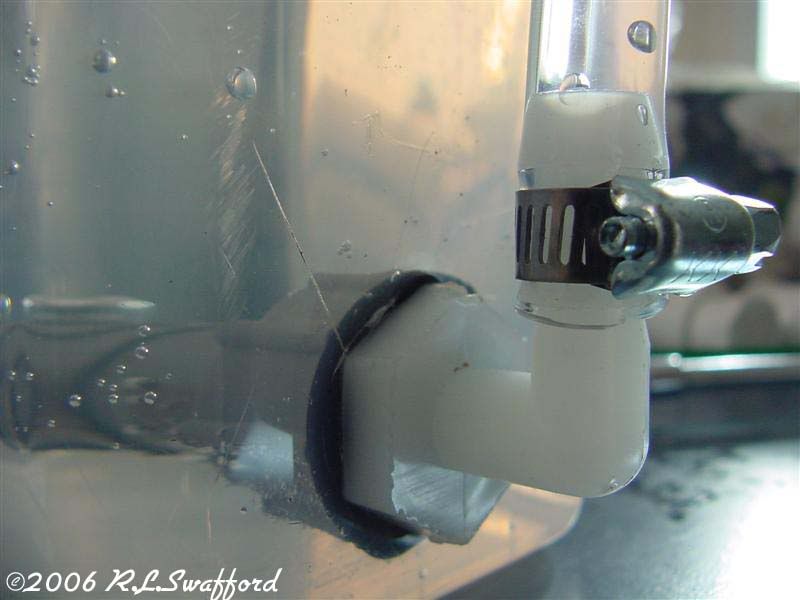
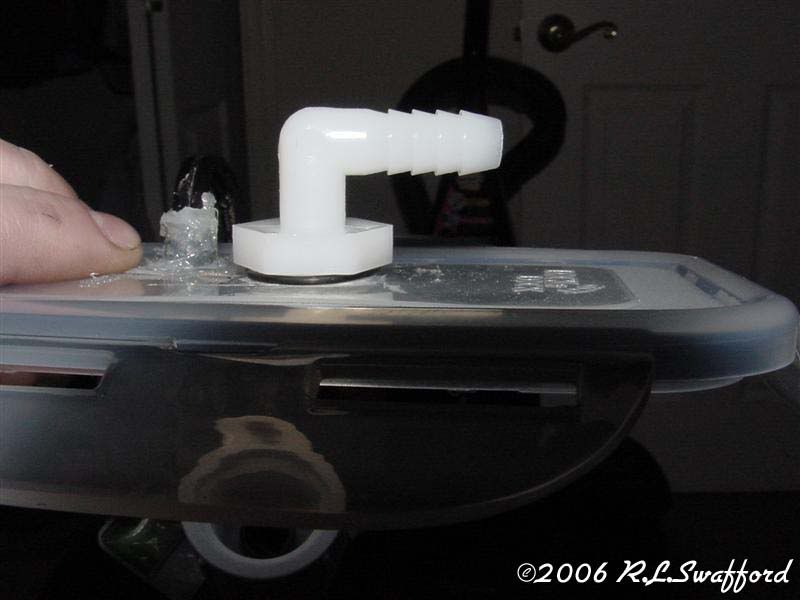
I drilled a hole in the center of the lid for the pump outlet to fit. It was made just slightly smaller then the pump nozle to help get a good grip around it. Since the pump was going to be inside the filter, I had to make a way for the power cord to fit as well. I drilled a smaller hole for the power cord to fit though. I cut the cord, fed it though the hole, then reconected the cord with butt conectors and a bit of shrink tubes just for safely sake. I've found out plenty of times that water and electricity just don't mix well.")


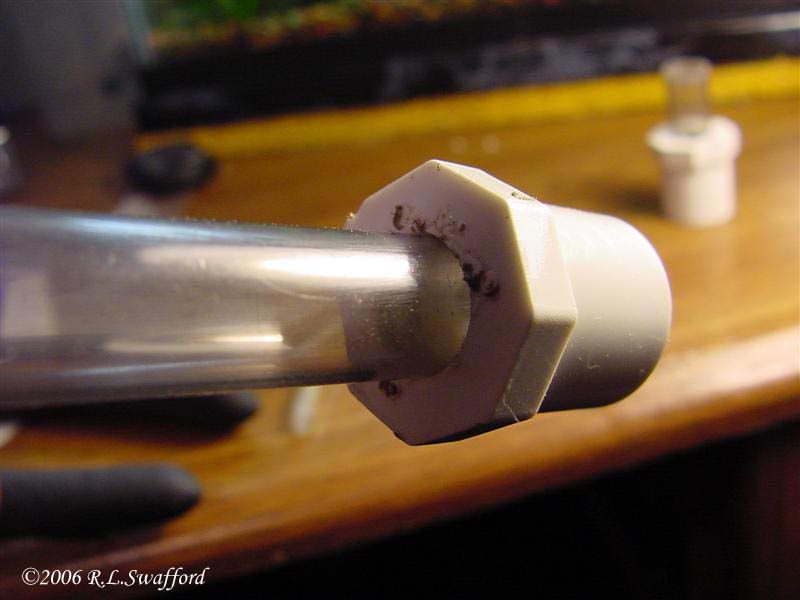
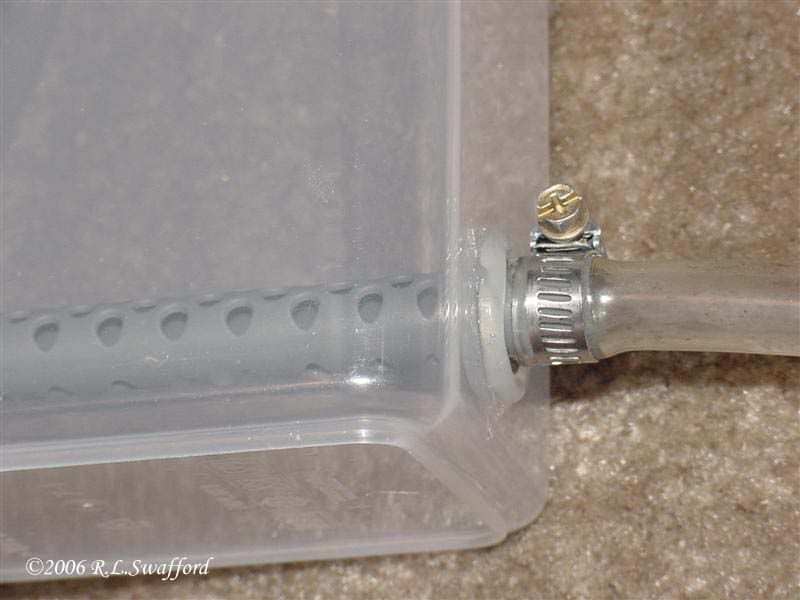
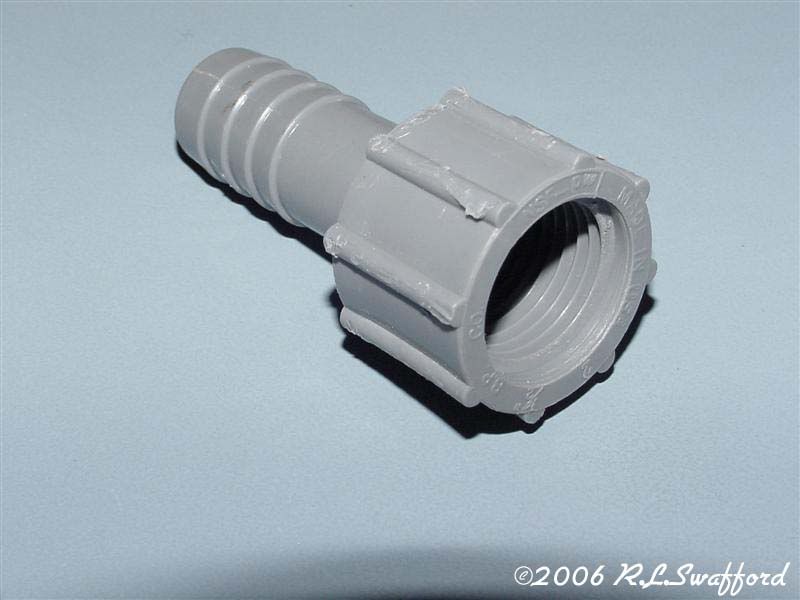
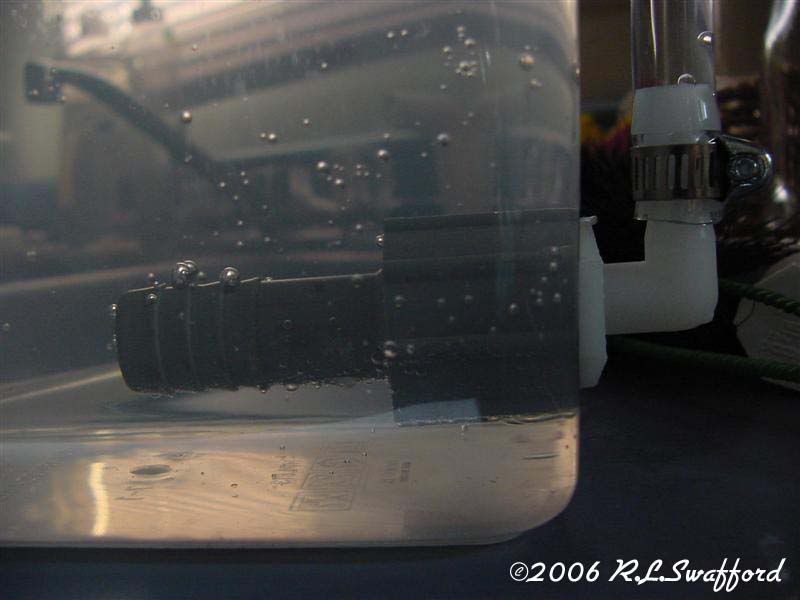
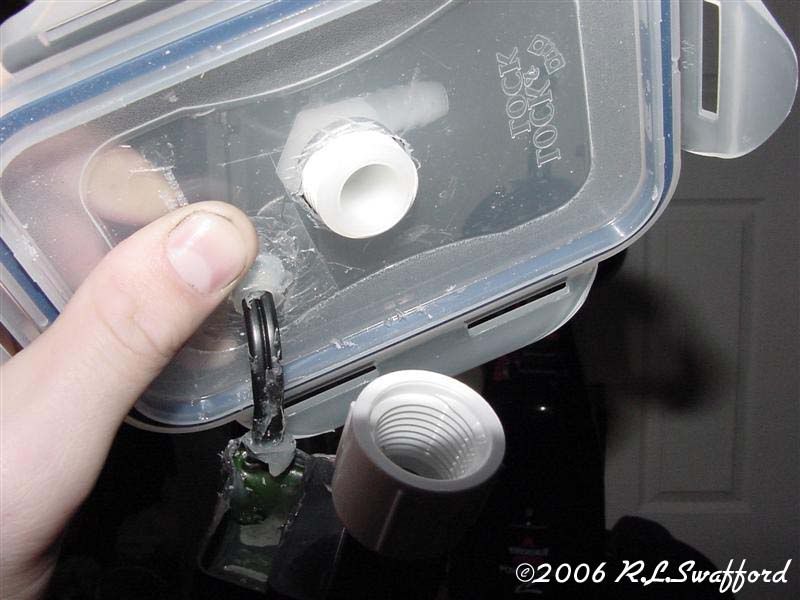
So now I had pretty much got the parts done to return the water too the tank. Now I was left with the question of how to get the water from the tank to the filter. I'm the type that if I'm going to use something for a project, I would like to leave it as intact as I can. This way incase the project doesn't work out or what ever, I can still use the parts in other projects, or even back for the original use. I took the pipe from a sponge filter that the sponges went around for the water intake. Agian I drilled a small hole in the side of the container just big enough to squeeze the pipe though. This left me with a good place on the outside of the filter to be able to connect my lines too, as well as even distribution of water going into the filter.
This is the part from the sponge filter.


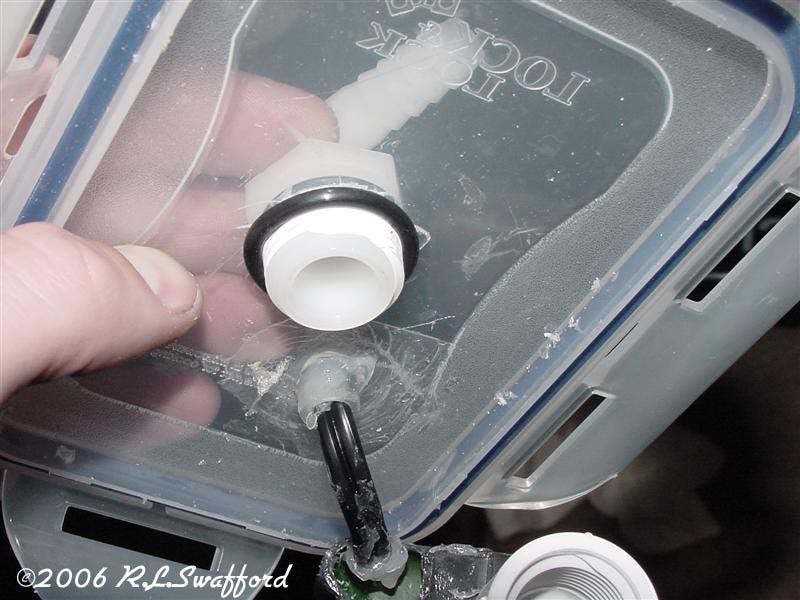
Since this was all a test, I hadn't really done anything to permentialy bond the pump and intake pipe to the container. I used my hot glue gun to secure and seal around all the holes and equipment. This is just a temporary measure , one just to make sure that the thing is going to work at all and would be feisable to continue, and secondly so I can test things and be able to make adjustments to the equipment without much headache. If things go well I will replace the glue with silicone for a more permenate and better seal and bond.


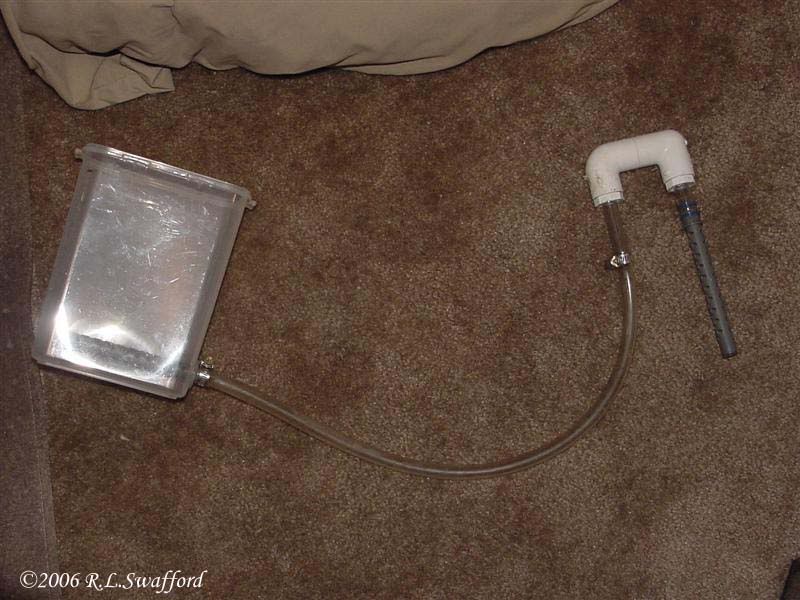
So we are all glued up and ready go. Already found the first problem: Anyone thinks a fluval is difficult to prime try one of these babies! It's not so much that it's difficult as it is tricky. Of course by useing standing water that was lower than the top of the filter didn't help any by putting gravity aginst me. This shouldn't be as much of an issue once it's on the tank because then the water will actualy be a little bit higher than the filter. So I got everything hooked up, primed and ready to roll. After finding a small air leak in the top where the power cord runs though and re-sealing that, it worked great in the kitchen sink. I let it run for two hours, and it didn't loose a bit of water from the filter except where it was supposed too (the filter return).
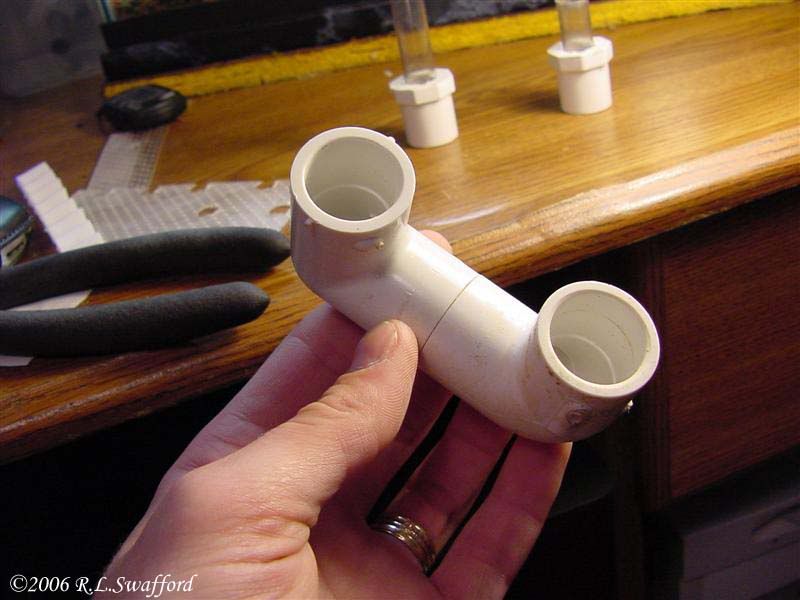
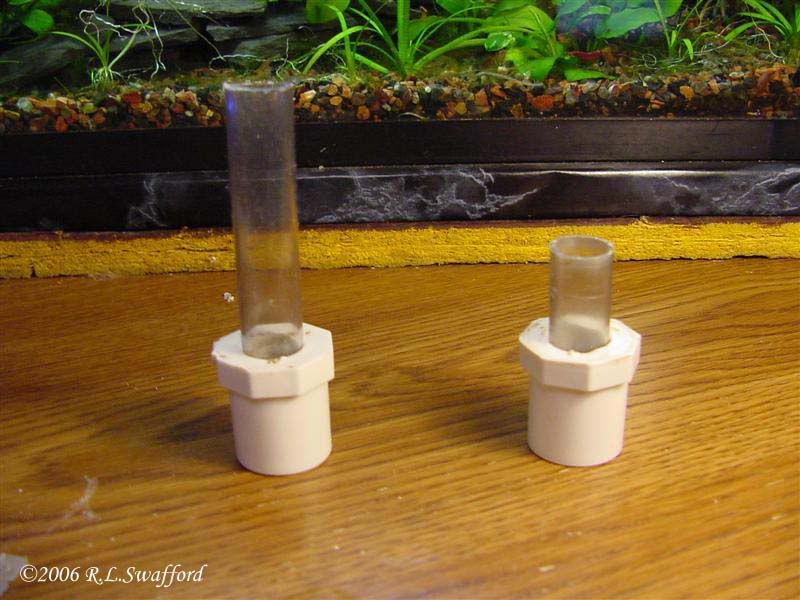
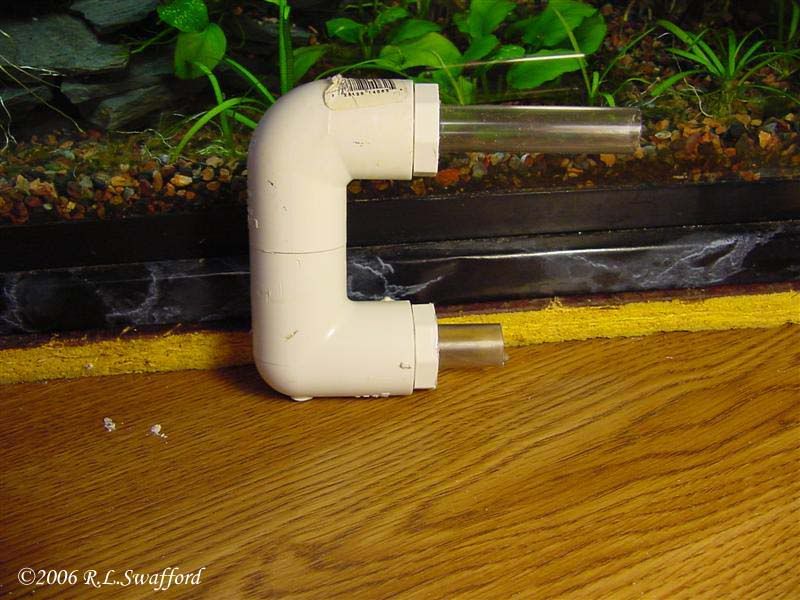
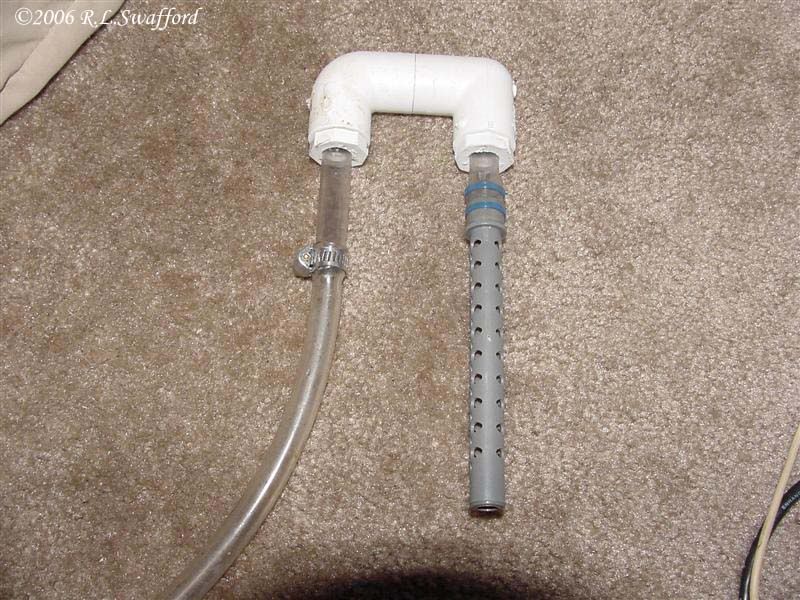
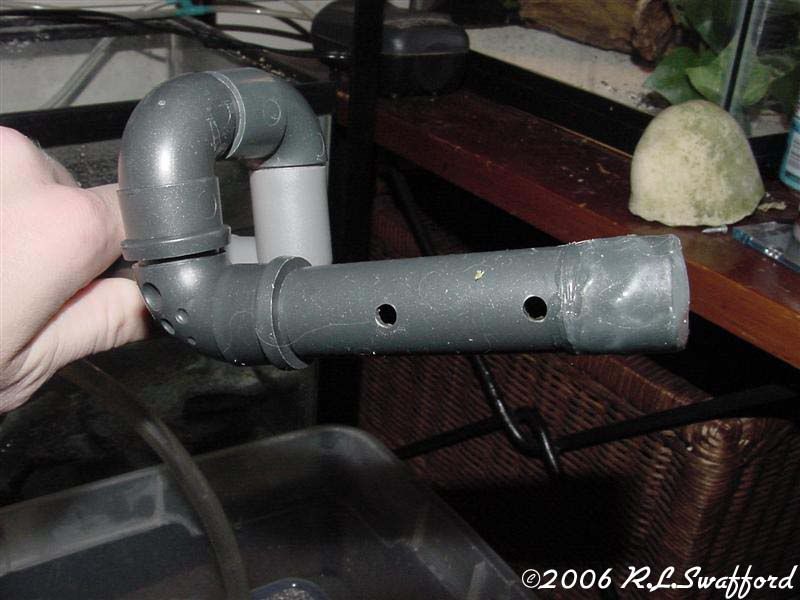
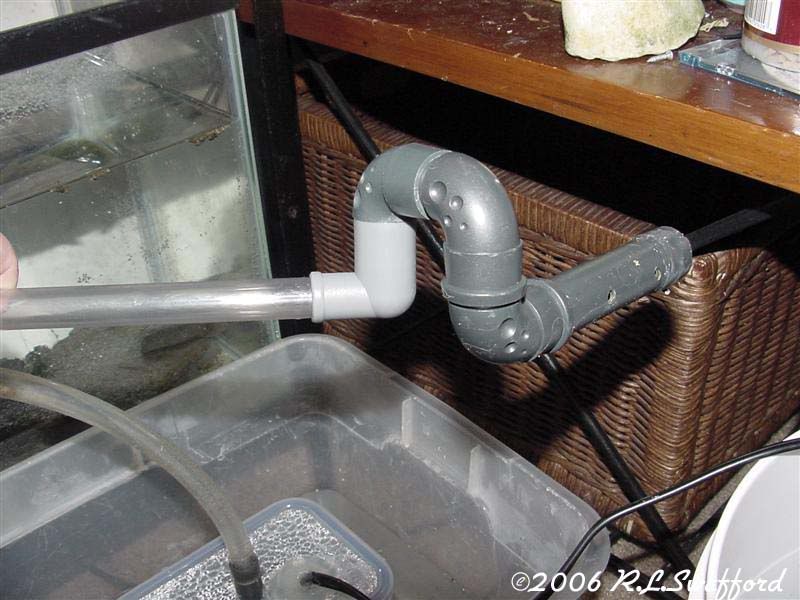
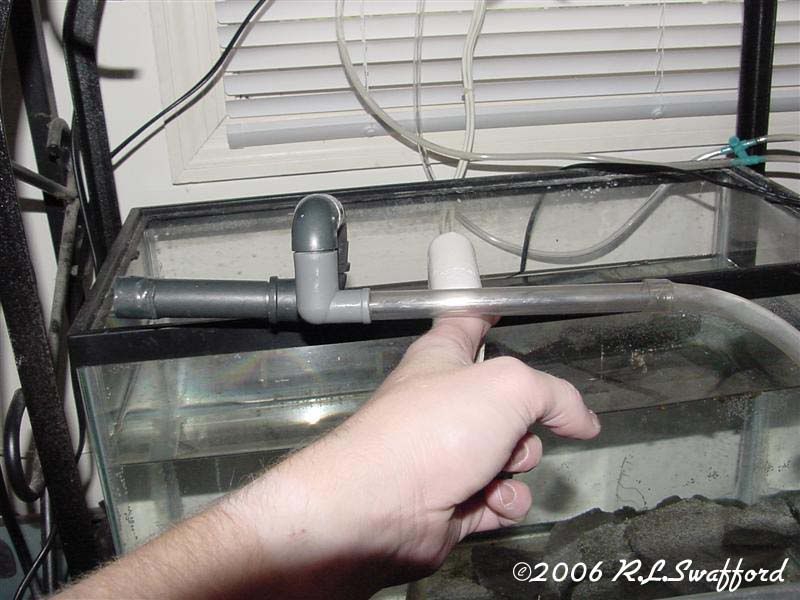
So far this project has cost less than a pack of smokes, and from the trial run looks to be a sucsess. All that's left is to figure a way to get the plumbing from the tank to the filter. I do know that for the intake that's going to be in the tank I will be useing the same part off of the sponge filter as what's in the container. This will still give good flow to the canister, and protect the shrimp. The return that's in the tank is likley to just be a small elbow of sorts.
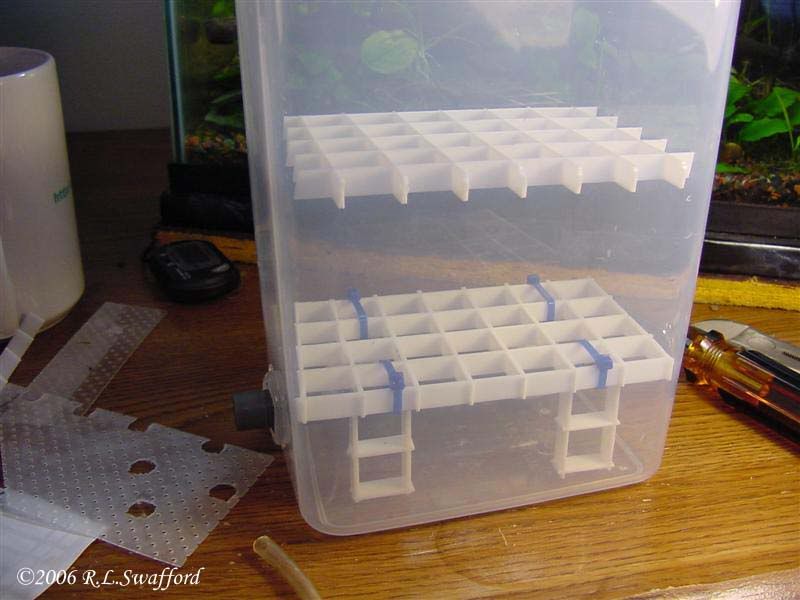
The media isn't going to be anything fancy. I may put a layer or two of floss at the top, but most is going to be biological media. I've several of the plastic pot scrubbers that will work great, and eventualy I may break down and get some actual bio-rings or something similar to those.
I'll still keep this updated as I progress along from this point.
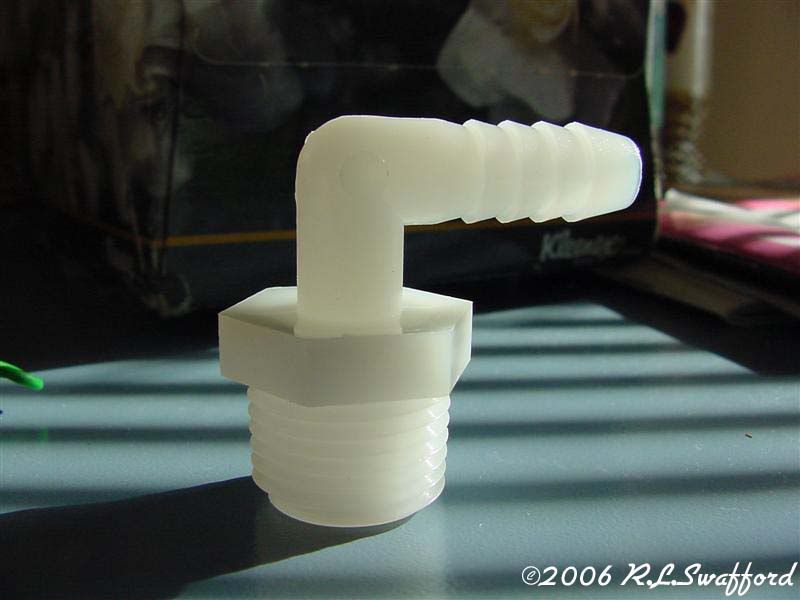
For larger versions of this canister, bulkheads would make a wonderfull addition to it. This would allow one to get the good intake and return holes already in the canister while still keeping a water tight seal around them. I had thought about making some out of PVC, but seeing as how small the tubes are for this filter, it would be more of a challange to get them up to 1/2 inch size and back down agian than it would be worth.
Any comments or questions are always welcome.
Over time of searching the net for various things I recall seeing plans and idea's for a DIY canister filter. While the idea intreaged me, I had always thought it to be too much of a hasle to really bother with. Then I cam across plans for a 'nano' canister filter just for small tanks. I was blown away by the simplisity of said filter, and decided that it was time to give it a whirl.
So I went shopping last night for a container to act as the main canister houseing. This is where the pump and the media would be. I chose to use a 'Lock and Lock' brand container.
I was rather happy to see that my local wal-mart carried these. I had read account of others not being able to find these and were using regular zip lock containers. The zip lock containers apparently were good about not letting air in, but not so good at keeping the water in. The Lock and Lock containers not only have the four clips to hold the lid on, but also a silicone gasket to further help create an airtight/watertight seal. Anything can conseavably be used for a container, as long as it can be airtight. I opted for the square container so that I wouldn't have to drill, or seal up any holes made on a round surface.
Total cost so far, $2.97 per container, I bought two 'just in case'.
The most pricey item for a project like this is going to be the pump. But thankfully my years of hording up old parts and equipment have paid off some what, and I had a few pumps on hand that I could choose from. I decided to use an exo-terra repti-pump. It was made to power a small water feature in a reptile setup. It has a low flow rate, and small size so it is perfect for this project.
I decided to place the pump inside the actualy container for a few reasons. First of all so that I didn't have to have any equipment showing in the tank, and secondly to keep things neater by keeping the 'filter' as compact as possible.
I drilled a hole in the center of the lid for the pump outlet to fit. It was made just slightly smaller then the pump nozle to help get a good grip around it. Since the pump was going to be inside the filter, I had to make a way for the power cord to fit as well. I drilled a smaller hole for the power cord to fit though. I cut the cord, fed it though the hole, then reconected the cord with butt conectors and a bit of shrink tubes just for safely sake. I've found out plenty of times that water and electricity just don't mix well.
So now I had pretty much got the parts done to return the water too the tank. Now I was left with the question of how to get the water from the tank to the filter. I'm the type that if I'm going to use something for a project, I would like to leave it as intact as I can. This way incase the project doesn't work out or what ever, I can still use the parts in other projects, or even back for the original use. I took the pipe from a sponge filter that the sponges went around for the water intake. Agian I drilled a small hole in the side of the container just big enough to squeeze the pipe though. This left me with a good place on the outside of the filter to be able to connect my lines too, as well as even distribution of water going into the filter.
This is the part from the sponge filter.
Since this was all a test, I hadn't really done anything to permentialy bond the pump and intake pipe to the container. I used my hot glue gun to secure and seal around all the holes and equipment. This is just a temporary measure , one just to make sure that the thing is going to work at all and would be feisable to continue, and secondly so I can test things and be able to make adjustments to the equipment without much headache. If things go well I will replace the glue with silicone for a more permenate and better seal and bond.
So we are all glued up and ready go. Already found the first problem: Anyone thinks a fluval is difficult to prime try one of these babies! It's not so much that it's difficult as it is tricky. Of course by useing standing water that was lower than the top of the filter didn't help any by putting gravity aginst me. This shouldn't be as much of an issue once it's on the tank because then the water will actualy be a little bit higher than the filter. So I got everything hooked up, primed and ready to roll. After finding a small air leak in the top where the power cord runs though and re-sealing that, it worked great in the kitchen sink. I let it run for two hours, and it didn't loose a bit of water from the filter except where it was supposed too (the filter return
). So far this project has cost less than a pack of smokes, and from the trial run looks to be a sucsess. All that's left is to figure a way to get the plumbing from the tank to the filter. I do know that for the intake that's going to be in the tank I will be useing the same part off of the sponge filter as what's in the container. This will still give good flow to the canister, and protect the shrimp. The return that's in the tank is likley to just be a small elbow of sorts.
The media isn't going to be anything fancy. I may put a layer or two of floss at the top, but most is going to be biological media. I've several of the plastic pot scrubbers that will work great, and eventualy I may break down and get some actual bio-rings or something similar to those.
I'll still keep this updated as I progress along from this point.
For larger versions of this canister, bulkheads would make a wonderfull addition to it. This would allow one to get the good intake and return holes already in the canister while still keeping a water tight seal around them. I had thought about making some out of PVC, but seeing as how small the tubes are for this filter, it would be more of a challange to get them up to 1/2 inch size and back down agian than it would be worth.
Any comments or questions are always welcome.